Creating a Home Assistant Panel with ESP32-P4: A Practical Guide
| Shelf | Development |
|---|---|
| Date in | |
| Readers | 796 |
Transform an ESP32-P4 module into a wall-mounted Home Assistant control panel with a touch-enabled 10.1-inch display for user-friendly smart home management.
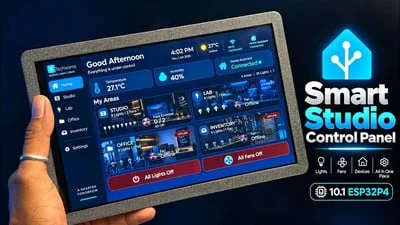
Building a dedicated control panel for your smart home setup can greatly enhance the efficiency and accessibility of your Home Assistant environment. Leveraging the ESP32-P4 module, enthusiasts can create a powerful wall-mounted touchscreen control panel equipped with a 10.1-inch TFT LCD display. Here's a detailed examination of the hardware, software, and the practical implications of this project.
Hardware Overview
At the core of this build is the ESP32-P4 module, which boasts impressive specifications like a dual-core 400 MHz processor, 16 MB of flash storage, and 32 MB of PSRAM. This configuration ensures it can handle multiple concurrent tasks smoothly, crucial for a responsive user interface. Additionally, it supports essential connectivity features, including WiFi, Bluetooth, and Ethernet, allowing seamless integration with a variety of devices in a smart home ecosystem.
The display itself is a 10.1-inch capacitive touchscreen with a resolution of 1200×800 pixels. This screen can recognize up to five simultaneous touch points, making it suitable for interactive applications where users might want to control multiple functions at once, such as adjusting lighting or temperatures in different rooms.
Getting Started With Assembly
The project starts with assembling the hardware components. Once the ESP32-P4 module is secured within a 3D-printed frame designed for wall mounting, the TFT LCD connects directly to it. The build simplifies the hardware setup as the ESP32-P4 comes ready with pre-loaded firmware. Users can get started with minimal coding since the essential WiFi and Bluetooth functionalities are ready to use right out of the box.
Software and User Interface
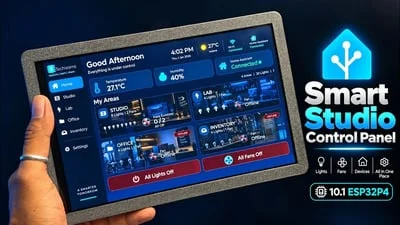
The interface is crafted using the LVGL (Light and Versatile Graphics Library), which provides a flexible and efficient way to create an engaging graphical user interface (GUI) tailored for the touchscreen. LVGL supports various widgets and lets developers design a custom layout. In this instance, the interface organizes controls into groups by room, allows for displaying real-time data like temperature and humidity, and facilitates control over functionalities such as fan speed.
One of the core advantages of using Home Assistant for managing smart home devices is its ability to integrate a wide range of devices across various platforms, whether they are Zigbee, Z-Wave, or WiFi-enabled. By synchronizing the ESP32-P4 panel with the Home Assistant dashboard, users can monitor and control all linked devices right from the custom-built interface.
Practical Considerations
When planning this build, it’s essential to consider several practical factors. The ESP32-P4's GPIO expansion capabilities allow you to connect additional sensors or control modules, enabling future upgrades to the control panel. Moreover, it features support for SD card storage, potentially expanding its capabilities by allowing local logging of data collected from sensors or for media playback functionalities.
The project not only adds functional user control but also serves as a visual element in your home. The 3D-printed frame can be customized to fit into your interior design seamlessly, providing a cohesive look to your technology without compromising aesthetics.
Limitations and Future Developments
However, there are limitations to be aware of. The size of the 10.1-inch display may restrict the number of elements that can be displayed simultaneously without making the interface feel cluttered. As smart home technology evolves, so will user expectations for more sophisticated interfaces and smoother integrations. It will be interesting to observe how future iterations of the ESP32-P4 or other controllers handle these growing demands.
Moreover, as Home Assistant releases new updates and features, it would be beneficial for panel builders to keep an eye on compatibility and leverage any new functionalities offered. Engaging with the Home Assistant community can also provide insights into common enhancements and best practices.
Conclusion
This project exemplifies how existing modules like the ESP32-P4 can be used creatively to expand smart home control capabilities. Whether for personal use or as a prototype for a broader application, the blending of hardware and customizable, dynamic software positions this ESP32-P4 panel as a worthwhile pursuit for those looking to refine their smart home ecosystems.
For detailed assembly instructions and visual guidance, check out the full article and a supporting video demonstration.